Auto Publish News Articles, Pages and Events to Facebook, Twitter, LinkedIn & More
- You are here:
- Home /
- Help Topics /
- Auto Publish News Articles, Pages and Events to Facebook, Twitter, LinkedIn & More
As a team manager I am always finding it difficult to keep up with the different ways our players and supporters are communicating with one another. One minute its Facebook, next minute its Twitter and lots still rely on trusty RSS.
Wouldn’t it be great if you could write a news article once, click your publish button and users of Facebook, Twitter, LinkedIn and RSS are ALL notified at the same time of the article?
This is where teamthing.com comes in; from your dashboard you have the ability to create your news item and choose to post a notification of the article on your Facebook Fan Page, Twitter and/or LinkedIn pages.
First we need to link your social media accounts up to your teamthing.com website.
1. Login to your Facebook account.
2. Go to the Facebook Developers page: https://developers.facebook.com/apps
3. Click “+ Create New App” button. Fill “App Name”, “App Namespace”, agree to policies and click “Continue”, fill captcha, click “Continue”.
– Notice App ID and App Secret on this page.

4. Click “Website”, enter your website URL
5. Enter your domain to the App Domain. Domain should be the same domain from URL that you have entered to the “Website” during the step 4.
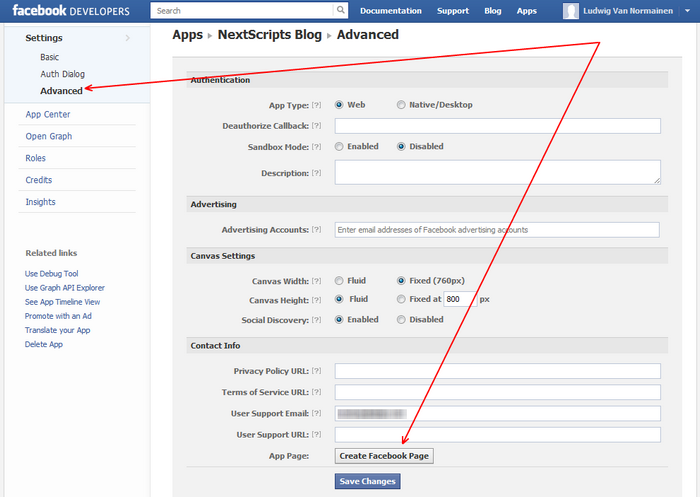
6.[Optional – you can skip this step and use existing page] Click “Advanced” from the left side menu “Settings.”. Scroll all the way down and click “Create Facebook Page” button. Facebook will create Community page for your App. Click on it and see the URL. It will be something like http://www.facebook.com/pages/Your-Site-Community/304945439569358
1. Login to your teamthing Admin Panel, Go to the Settings->{SNAP}Social Networks AutoPoster Options.
2. Check “Auto-publish your Posts to your Facebook Page or Profile” checkbox.
3. Fill URL of your Community page from step 6 above.
4. Fill “App ID” and “App Secret” from step 3 above.
1. Click “Update Settings”. Notice new link “Authorize Your FaceBook Account”.
2. Click “Authorize Your FaceBook Account” and follow the Facebook authorization wizard. If you get any errors at this step, please make sure that domain for your WordPress site is enetred to your App as “App Domain”.
1. Login to your Twitter account.
2. Go to the Twitter Developers website: https://dev.twitter.com/ Sign in again if asked.
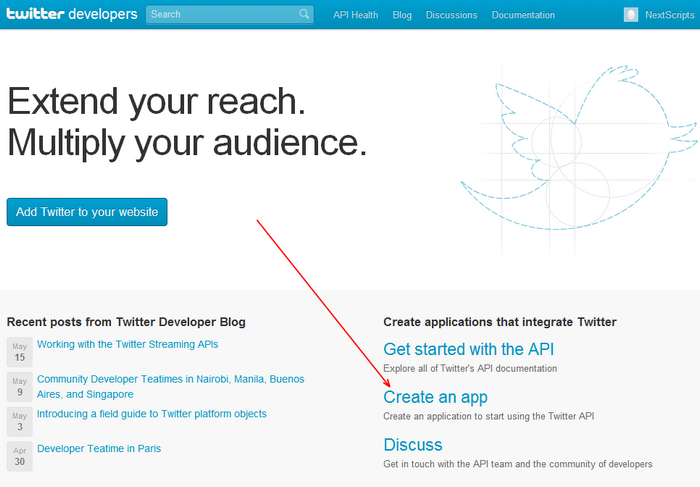
3. Click “Create an app” link from the right panel. Fill details, click “Create your Twitter application”.
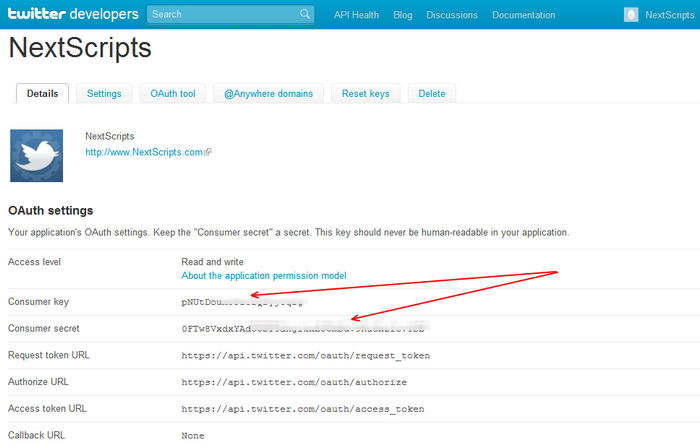
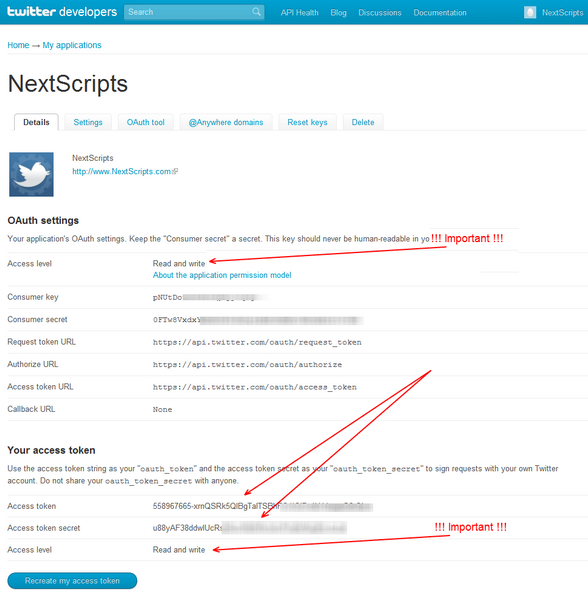
– Notice Consumer key and Consumer secret on this page.
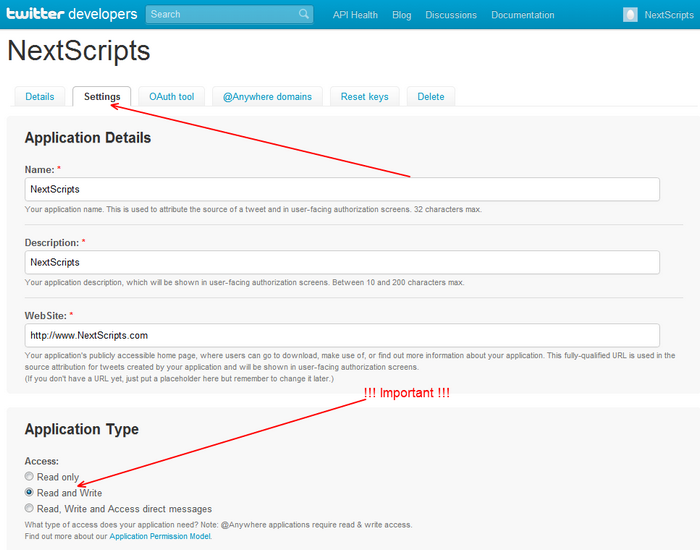
4. Click “Settings” tab. Scroll to the “Application type”, change Access level from “Read Only” to “Read and Write”. Click “Update this Twitter application settings”.
5. Come back to “Details” tab. Scroll to the “Your access token” and click “Create my access token” button. Refresh page and notice “Access token” and “Access token secret”. Make sure you have “Read and Write” access level.
1. Login to your WordPress Admin Panel, Go to the Settings->Social Networks AutoPoster Options.
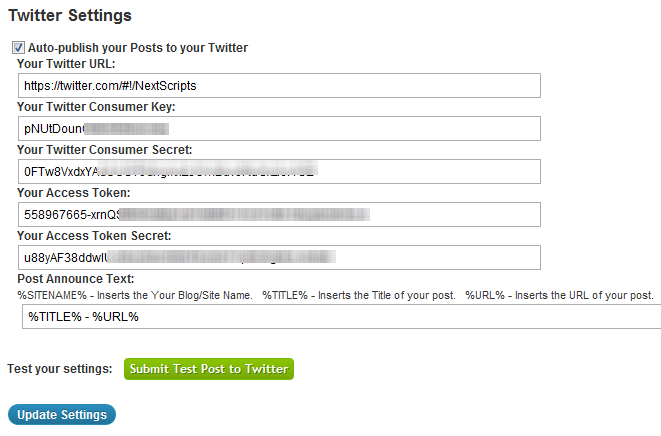
2. Check “Auto-publish your Posts to your Twitter Page or Profile” checkbox.
3. Fill your Twitter URL.
4. Fill “Consumer key” and “Consumer secret” from step 3 above.
5. Fill “Access token” and “Access token secret” from step 5 above.
